

Why Use Webhooks?
Keep your application synchronized with CoinGecko in real-time — no cron jobs or polling required. Listen to events likecg.coin.info.updated and react instantly to changes.
Automated Asset Updates
Update your UI when a token rebrands, changes ticker, or updates its logo.
Cross-Chain Monitoring
Detect when a project deploys on a new chain or migrates a contract address.
Risk & Compliance
Act immediately on critical alerts — malicious activity warnings or contract migration notices.
Share Feedback
Help us improve Webhooks — share your suggestions and use cases.
Getting Started
Create a webhook
Go to the Developer Dashboard and create a new webhook endpoint.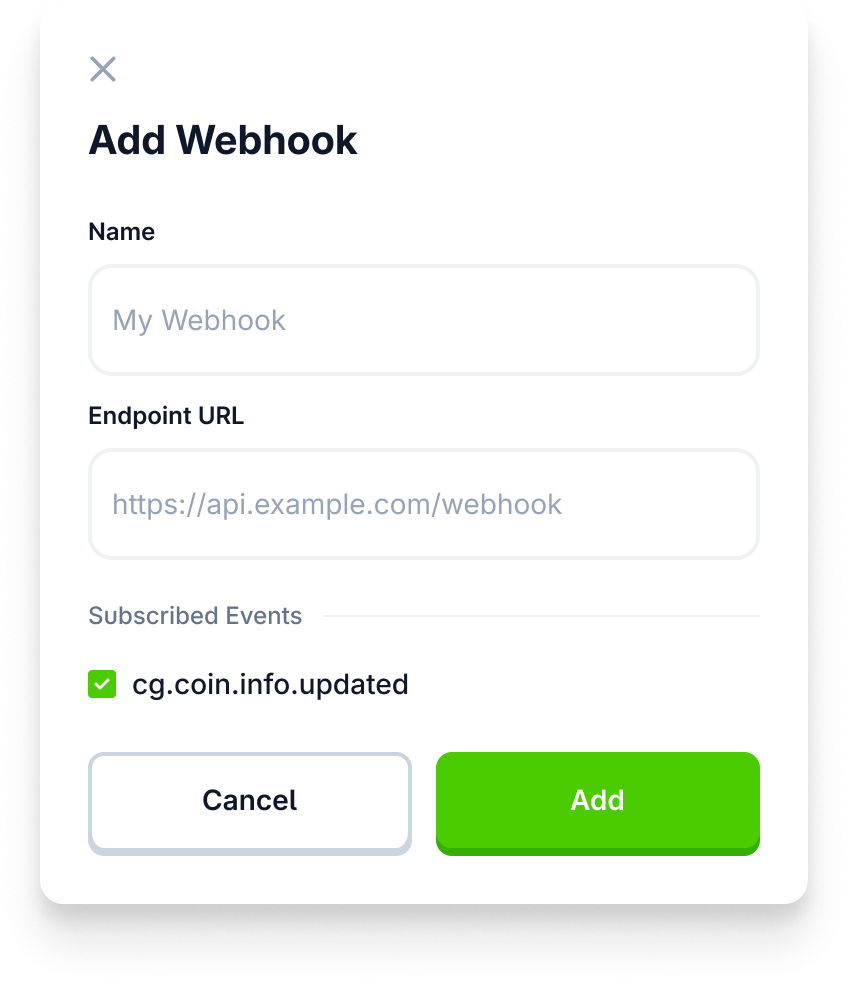
Start receiving events
Your server will receive POST requests whenever relevant coin data changes on CoinGecko.com.
For team accounts, non-owner users invited to a shared dashboard have full access to view, edit, and delete webhooks.
Event Types
| Event Type | Description |
|---|---|
| cg.coin.info.updated | Core coin information updated (metadata, links, categories, etc.) |
| cg.coin.price.updated | Coin crosses a user-defined price target |
| cg.coin.listed | New token indexed and listed on CoinGecko |
| More coming soon! | Share your suggestions |
HTTP Headers
Every webhook POST request includes these headers:| Header | Description |
|---|---|
Content-Type | application/json |
x-cg-timestamp | UNIX timestamp of the event. Useful for replay attack prevention |
x-cg-signature | HMAC SHA256 signature to verify authenticity |
x-cg-event-id | Unique identifier for the event |
Signature Verification
Verify that incoming payloads are genuinely from CoinGecko by computing an HMAC SHA256 hash and comparing it to thex-cg-signature header.
Signing string format: {timestamp}:{event_id}:{json_body}
Example Code
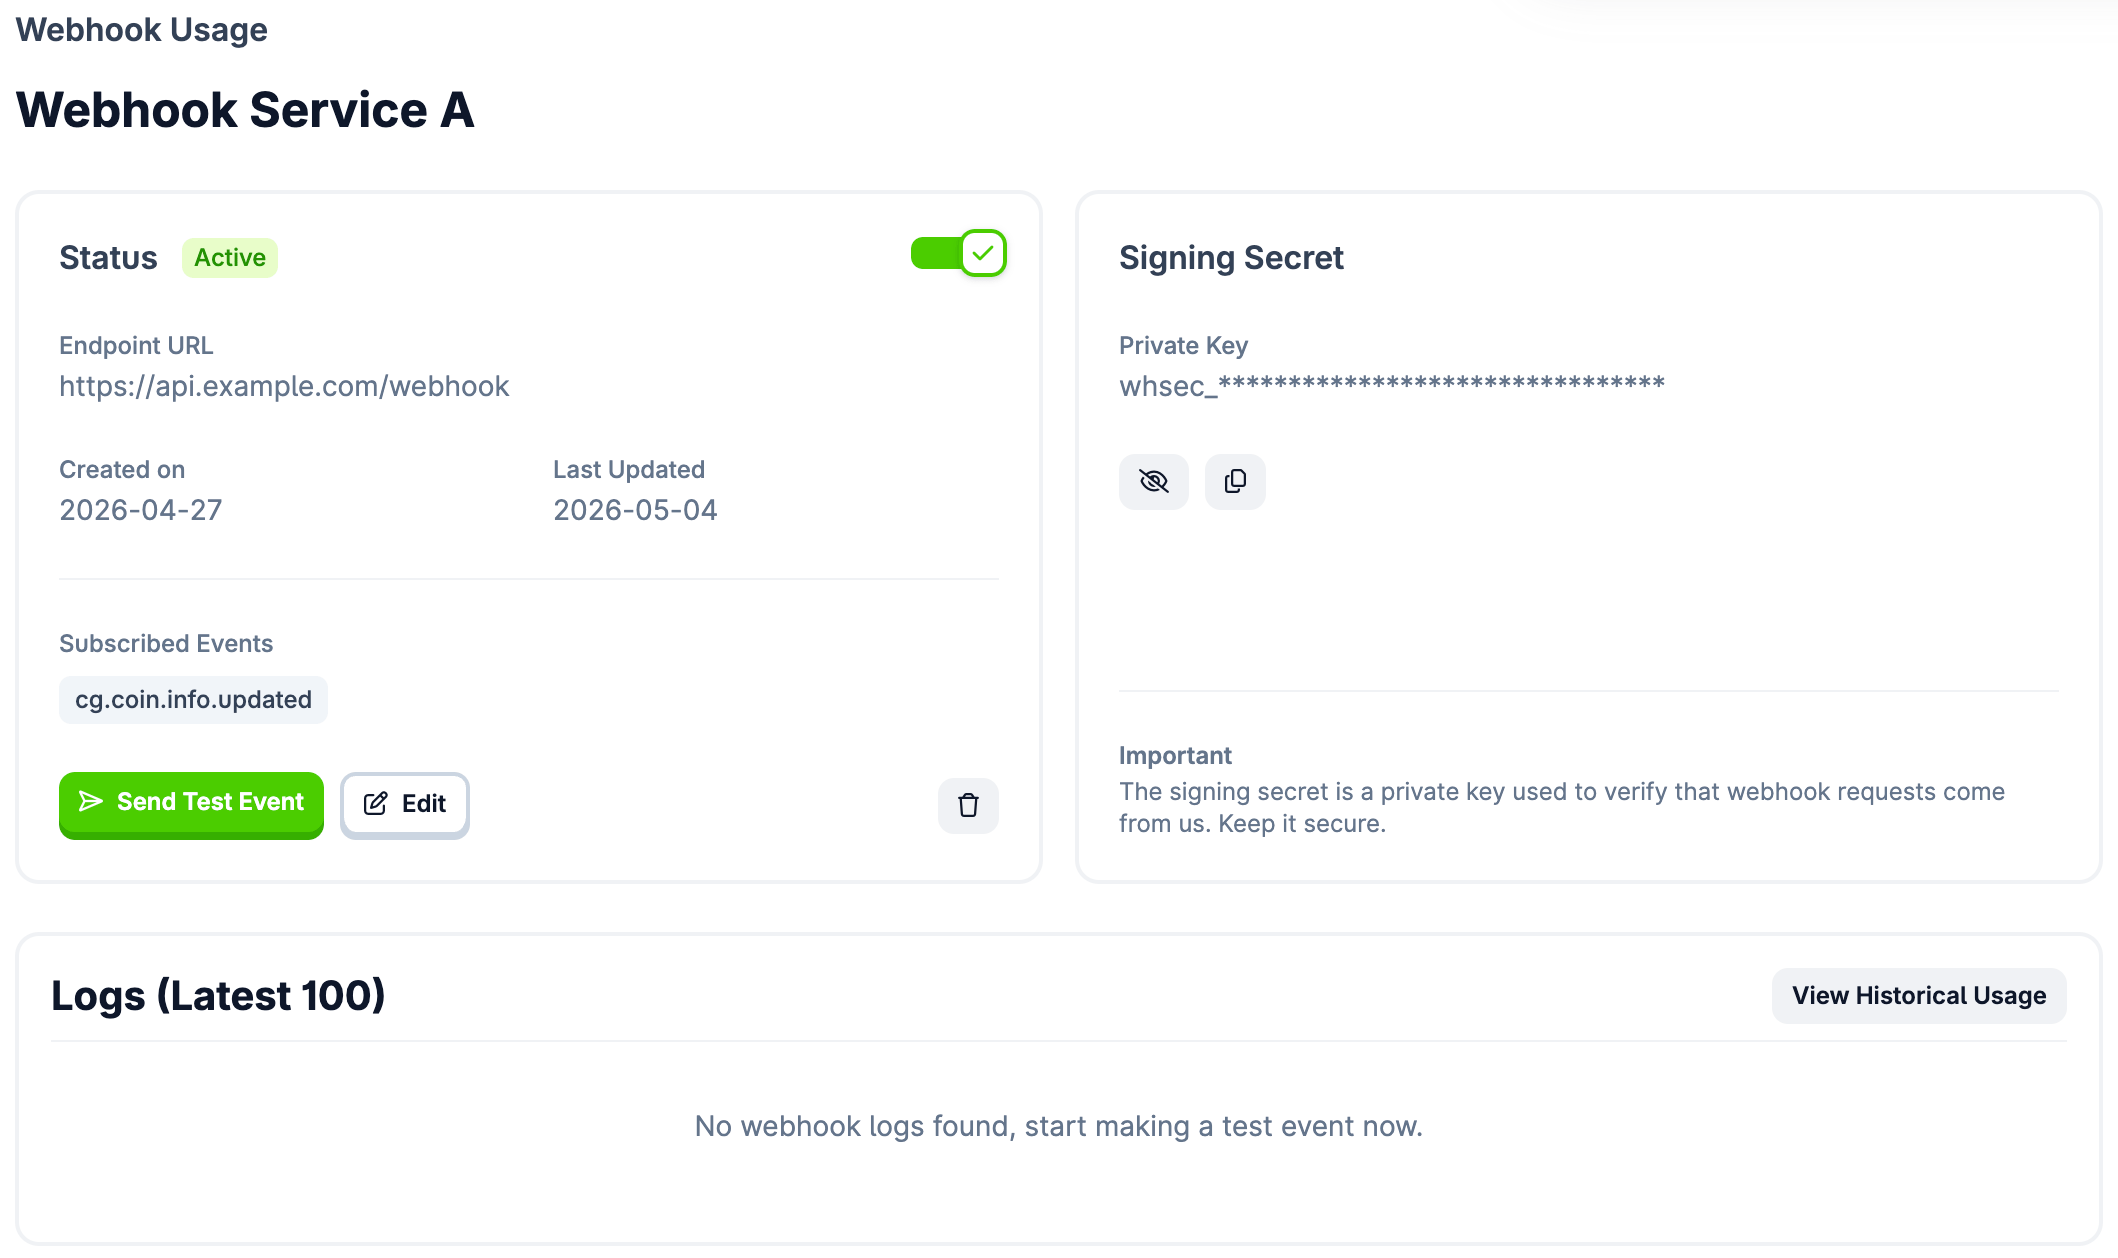
ReplaceYOUR_SIGNING_SECRETwith thewhsec_...value from your Developer Dashboard.
Managing Webhooks
Navigate to your Webhook Details page in the Developer Dashboard:- Send Test Event — dispatches a mock
cg.coin.info.updatedpayload. Use it to verify your server receives the request and responds with2xxbefore going live. - Delivery Logs — view the latest 100 delivery attempts. Use these to identify if your endpoint is rejecting requests.
Billing & Credits
- 10 credits per event delivery. Retries are not charged.
- If you run out of credits with Hardcap enabled (Overage disabled):
- Delivery stops immediately and all webhooks are auto-disabled.
- You’ll receive an email notification that delivery has stopped.
- You must manually re-activate webhooks in the Developer Dashboard after credits are replenished.
Estimated Usage
Each delivered webhook event consumes 10 credits. Thecg.coin.info.updated event listens to all active coins on CoinGecko — volume fluctuates based on market activity and how frequently projects update their metadata.
- Expected volume: up to 200 updates/day based on historical data.
- Estimated monthly cost: ~6,000 events/month = ~60,000 credits.
- Plan fit: comfortably within the Analyst plan and above.
These are approximations. Extreme market volatility or mass migrations could temporarily increase daily volume.
24-Hour Baseline Test
If you’re concerned about unpredictable credit usage, run a short test before committing:- Enable Hardcap — turn OFF “Overage” in the Developer Dashboard to avoid unexpected charges.
- Run for 24–48 hours — activate your webhook and let it collect events.
- Check consumption — review credit usage in the dashboard to establish a reliable baseline.
Retries & Failed Attempts
If your server fails to respond with a2xx status code, CoinGecko will retry with exponential backoff. Retry attempts are not charged.
A webhook is automatically disabled under either condition:
| Condition | Threshold |
|---|---|
| Single event backoff | 14 failed retries over ~24 hours |
| Aggregate failure cap | 300 failed retries across 12 hours |
- Check your server logs and resolve the issue.
- Log in to the Developer Dashboard.
- Manually toggle the webhook back to Active.